Writing a wiki article on Wiki u Tiv
Welcome to Wiki U Tiv, your portal for preserving and promoting the rich cultural heritage of the Tiv people. Whether you’re a seasoned writer or a novice, this tutorial will guide you through the step-by-step process of creating informative and captivating articles about the Tiv culture. With the user-friendly WordPress platform, account creation to article writing is simplified, making you an instant Wiki U Tiv author. Join us on this journey to share the compelling stories, traditions, and history of the Tiv community, contributing to a growing repository of knowledge that will illuminate the Tiv culture for generations to come. Creating an account with Wiki U Tiv is as easy as enjoying a banana. With any internet-enabled device, you can open an account from the comfort of your bed, chair, home, or wherever you find yourself. While Wiki U Tiv is accessible from various devices, for efficient writing without hassle, owning a computer—whether desktop or laptop—is recommended. This isn’t to discourage mobile Android and iPhone users from contributing articles or posting Tiv words and phrases on Wiki U Tiv. However, using a computer makes it more convenient for typing longer paragraphs and ensures proper organization of articles. Don’t worry if you don’t have immediate access to a computer; you can still write seamless articles on the Wiki U Tiv website using a tablet or phone.
Creating an account
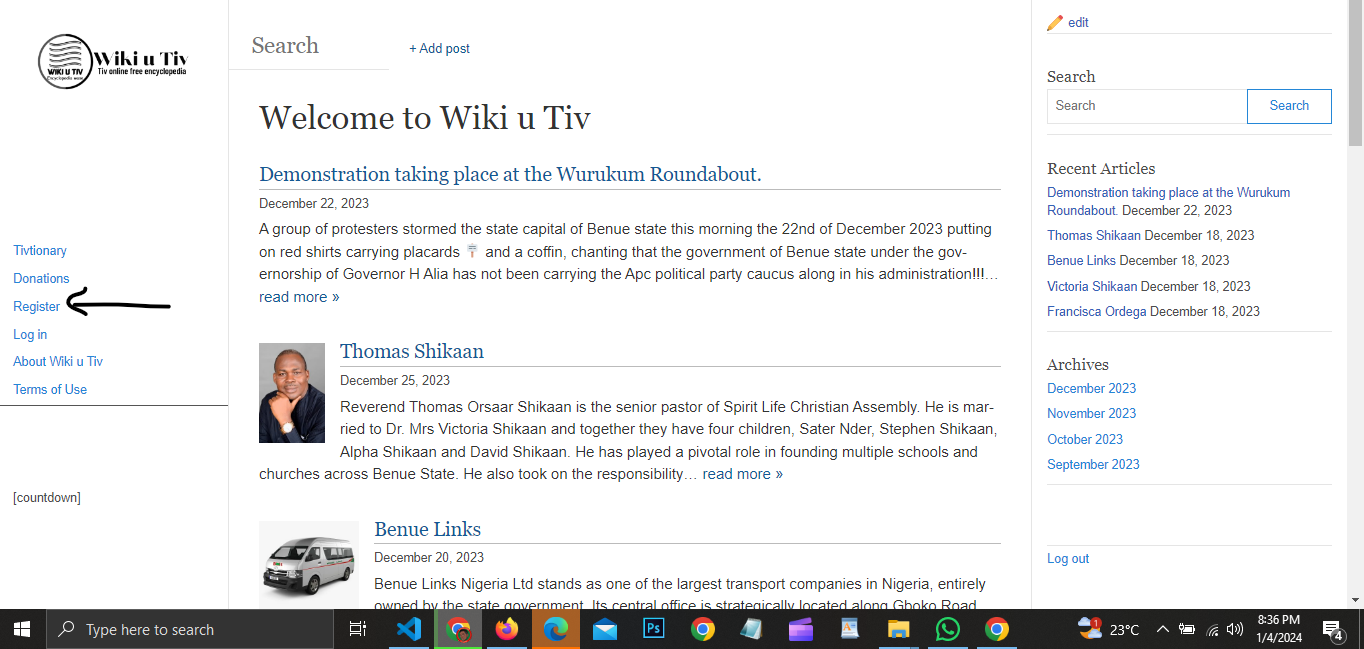
On any page within the Wiki U Tiv website, you’ll consistently find a prominently displayed menu item that clearly says “Register.

Article Writing
Upon successfully registering your account with Wiki U Tiv, the next step involves waiting for an administrator to review and approve your status as an author. The ability to write will be restricted until this authorization is granted, and the process is automated. All you need to do is wait for an email confirmation. However, if you don’t receive the email within two days, it’s advisable to periodically check for approval. Once approved, your journey as a writer on the platform begins.
Login to your wp-admin dashbaord
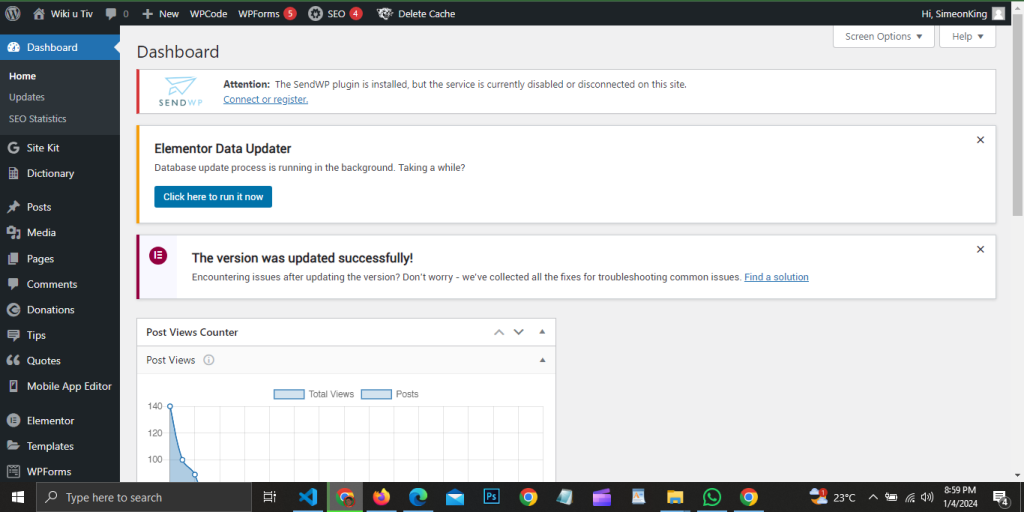
Once you log in to your admin dashboard, it resembles the image shown below.

Hover over or click the “New” icon, and select new post from the drop-down menu. If you’re using the desktop version of the site, you’ll see the “New” button. On the mobile version, you’ll only see a plus sign; click it to access the article page. Alternatively, you can hover over the “Posts” menu in the sidebar. A dropdown menu will appear, where you can click on “Add a New Post.”
Start writing
On the article page you would see a place where you should enter the title of your article, note that the different types of article range from news to biographies, histories, narrations e.t.c

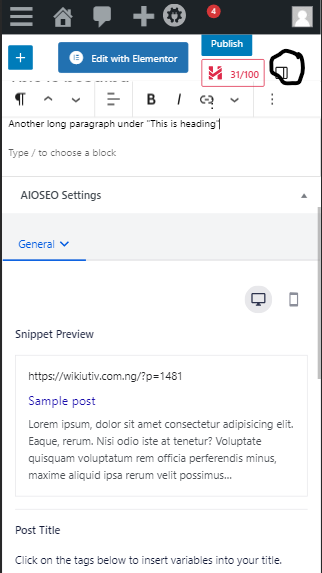
Once you enter your title, you can begin writing the details of your article by pressing the enter key on your mobile phone. Here is how it would appear on a mobile device:

The section enclosed by a black line is where you can accommodate all your lengthy paragraphs.
Adding headings
Each paragraph should be neatly formatted within appropriate headings. This entails ensuring that relevant headings are consistently present throughout your article. This practice helps in generating a clean table of contents, improve readability and contributes to aspects such as high rankings on Google and other SEO-related considerations.
Here is an example demonstrating how headings can be implemented. The designated post area, enclosed in black, is where you input your content. Below the dummy text, you’ll notice the prompt “Type/to choose a block.” In these text fields, you can begin writing. After completing a block, press Enter. You can either start a new heading or continue the existing heading as a new paragraph.
To designate a block as a heading, simply type your heading and select the icon highlighted with the red arrow. A dropdown menu will appear, allowing you to format your text as a paragraph (the default selection), heading, list, or quote. Please choose “heading” for the desired formatting.


For users on mobile and tablet devices, you need to tap on the plus sign. This action will open a popup prompting you to select the desired formatting; opt for “heading.” This comes after highlighting the text you intend to turn into a heading.
Once you’ve applied formatting to text as a heading, the black arrow in the picture indicates the toolbar where you can change the heading type. Headings range from H2 (the largest) to H6 (the smallest). This feature helps you organize your writing effectively. When you choose Heading 2 (which is the default selection), it signifies that the content under it belongs to Heading 2. Now, if you insert another heading and format it as Heading 3, this new heading becomes a child heading under Heading 2. If you add yet another heading as Heading 4, Heading 4 becomes a child of Heading 3, and Heading 3 remains a child of Heading 2. This hierarchy continues.
To illustrate, consider the analogy of studying a topic in school, such as “Nouns.” After defining nouns (Heading 2), you proceed to list types of nouns (Heading 3) and provide examples for each type of noun (Heading 4). This is similar to how our headings work – Heading 2 is the main heading, Heading 3 is a sub-heading under Heading 2, Heading 4 is a sub-heading under Heading 3, and so forth.
If you choose to place all your paragraphs under Heading 2, that’s perfectly fine; it means you have no sub-headings in your write-up. However, it’s essential to understand this structure as akin to organizing topics in an educational setting, creating a hierarchy for clarity and order.

Adding media
Any type of media can be added, including pdf in the course of writing your article, Just as you can add text on each block, in the same manner, media can be added on each block. See the picture below.
Once you have clicked on the plus icon, a menu pops up, there is a place to choose images, audio, or file, if you can’t see it, then search for what you want to upload.

Don’t worry it looks almost the same on mobile and tablet devices.
Setting featured image
While it’s not mandatory, setting a featured image is advisable for your article to rank well in search engines and enhance overall clarity. To do this, click on the “Post” tab located on the right-hand side of your screen. Scroll down to the “Featured Image” section and click on the box that says “Set featured image.” You’ll then be prompted to choose or upload your own image. If the desired image is not in the available list, please upload your own.


On a mobile or tablet device, the process remains the same; however, you should tap on the highlighted icon in the picture. Every other step remains unchanged.
Choosing Categories and Tags
The next step is to categorize your article and add tags. You can find this option under the “Post” tab on the right side of your computer. Simply scroll down to the “Categories” and “Tags” section. Choose the category that aligns with your article’s content. For instance, if you’re writing about a person, your article falls under Biographies, and that’s the category you should select. If the person is still alive, opt for “Living People”; if the person has passed away, choose “Dead People.”
Additionally, add relevant tags. There are various tags available, such as Christian women, men, athletes, criminals, and more. Select tags that best describe the content of your article.

Final checks and S.E.O
Don’t stress too much about Search Engine Optimization (SEO) – it’s already customized for you. I strongly recommend avoiding further adjustments, as meddling with it can potentially harm the website. However, there’s one thing you can do – add a focus keyphrase. This keyphrase is a word or phrase you believe people will use to search for your article on Google. For example, if your article is about the current Tor Tiv, your keyphrase could be “James Ayatse” or “Tor Tiv,” or any other term people might use in a Google search. Currently, we are limited to one keyphrase per post. Therefore, it’s advisable to use a concise article title to serve as your keyphrase.

Final Checks
Perform a final review of your post, ensuring there are no spelling or grammatical errors. If you are content with your writing, click the “Publish” button located in the top-right corner. Congratulations! If you’ve diligently followed all the steps outlined here, you likely possess the skills needed to become an excellent Wiki U Tiv author.
![]()

Thanks for the detailed update
We are glad that you found this article helpful